Thanks to some awesome work by an individual that goes by Monkeh on Discord, ATSAME70 support was officially merged with this commit. That’s pretty exciting, with all of the ATSAME70 boards being quite fast (300mhz processors) and more importantly, allowing both the Duet 3 6HC and 6XD boards to be converted over to klipper!
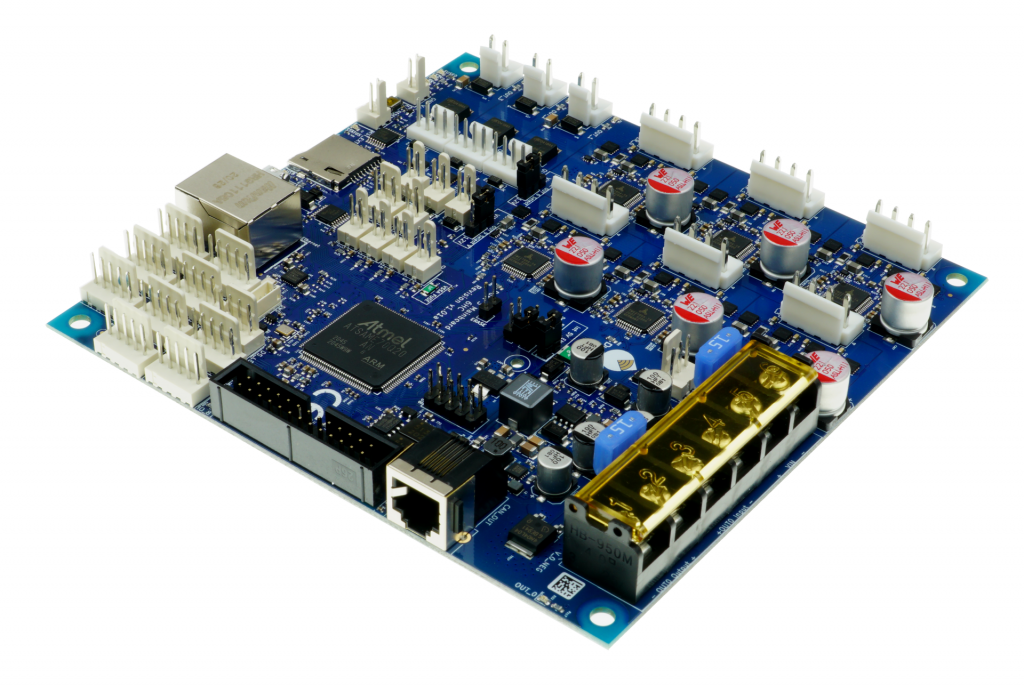
These boards are absolutely the pinnacle of incredibly durable, well designed boards that should live forever and ever, driving Nema 23 motors easily (6HD) or servo/closed loop steppers (6XD) without even more expensive hardware. I started my Stablebot adventure building off of a 6HC + 3HC, but shortly after started running machines on klipper firmware and honestly never looked back.
I’ve added the config with this pull request.
I’ve been running this stably for the last 6 months or so, so I’ll be sharing this config as well as how to flash it! This post assumes you know how to install klipper, moonraker and mainsail, and have your SBC connected to the duet via USB.
I recommend using the KIAUH tool https://github.com/th33xitus/kiauh - to do the above – it makes it very easy to get going!
- You’ll need the following compiling settings:
- ATSAME70Q20B chip selected
- And you’re done!

- Go ahead and save these, and then use the make command to make the firmware.
- From here, there are a few ways to flash your duet! – all are listed here: https://docs.duet3d.com/User_manual/RepRapFirmware/Updating_firmware
- Use the command make flash FLASH_DEVICE=/dev/ttyACM0

- You can bamboozle your duet by renaming the klipper.bin file to the “correct” name for the 6hc/6xd, listed in the “firmware file naming” section and using the built-in updater to get klipper installed!
- Fallback procedure #2 as described on updating firmware link – use this if things aren’t playing nice
- Use erase jumper to erase the firmware
- Use the command make flash FLASH_DEVICE=/dev/TTYACM0
- Use the command make flash FLASH_DEVICE=/dev/ttyACM0
- Worst case, you can use a laptop/windows computer with the same instructions detailed on duet’s website to flash the klipper.bin file!
- With a successful flash, the duet should be showing up in the /dev/serial/ folder! Use the command: ls /dev/serial/by-id or ls /dev/serial/by-path to get an address to use in the [mcu] section.

From there, with the config folder here, you should be good to go!
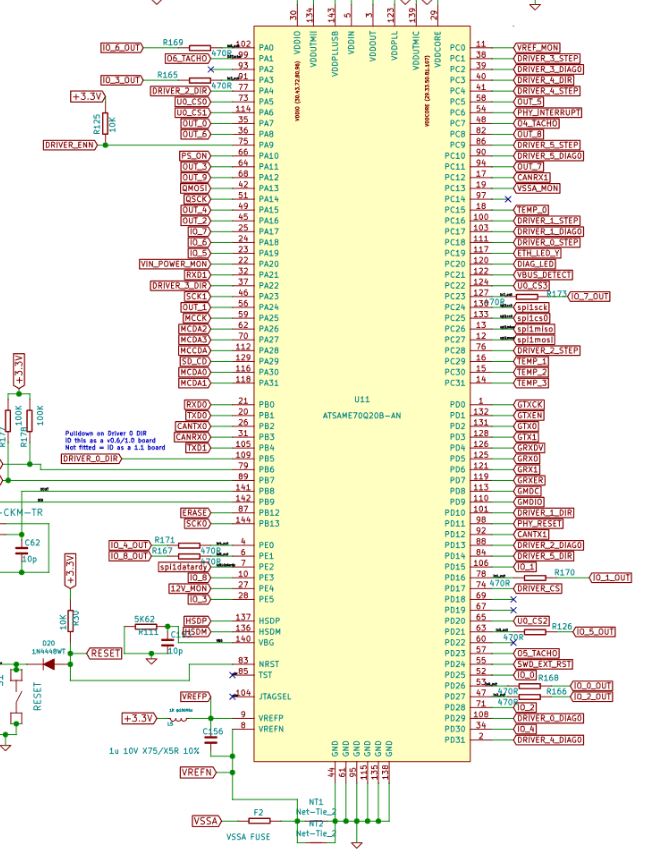
I understand that this is very much a barebones config, but you can find the other pins by using this diagram here, ever graciously posted publicly by Duet3d: https://github.com/Duet3D/Duet3-Mainboard-6HC/blob/master/Duet3_Mainboard_v1.01/Duet3_MB_Schematic_v1.01.pdf
If there are those out there who need some help, you can stop by my discord for some help from my community, or if you’re a business who needs professional support converting your installs over (or anything else for your machines/business), reach out to me at luke@lukeslabonline.com with your specific needs!


